
When Art Meets Science
I’m still experimenting with my larger glass pieces — still learning how to scale up my glass landscape pendants — and I suspect that process will never truly end. At some point, though, I do need to settle on a consistent method. I currently work with four layers of glass for my pendants and use the same structure for my larger pieces, since the pendants often serve as the test bed for bigger works. Keeping the process uniform makes sense. Because my pendants are small (about 2 x 4 cm), much of what happens in the kiln feels like serendipity. But when you spend hours designing a larger piece — and it looks stunning when stacked on the light box — only for the final result from the kiln to fall flat, you’re left with more than disappointment; you’re left with a glass conundrum.
The Glass Conundrum
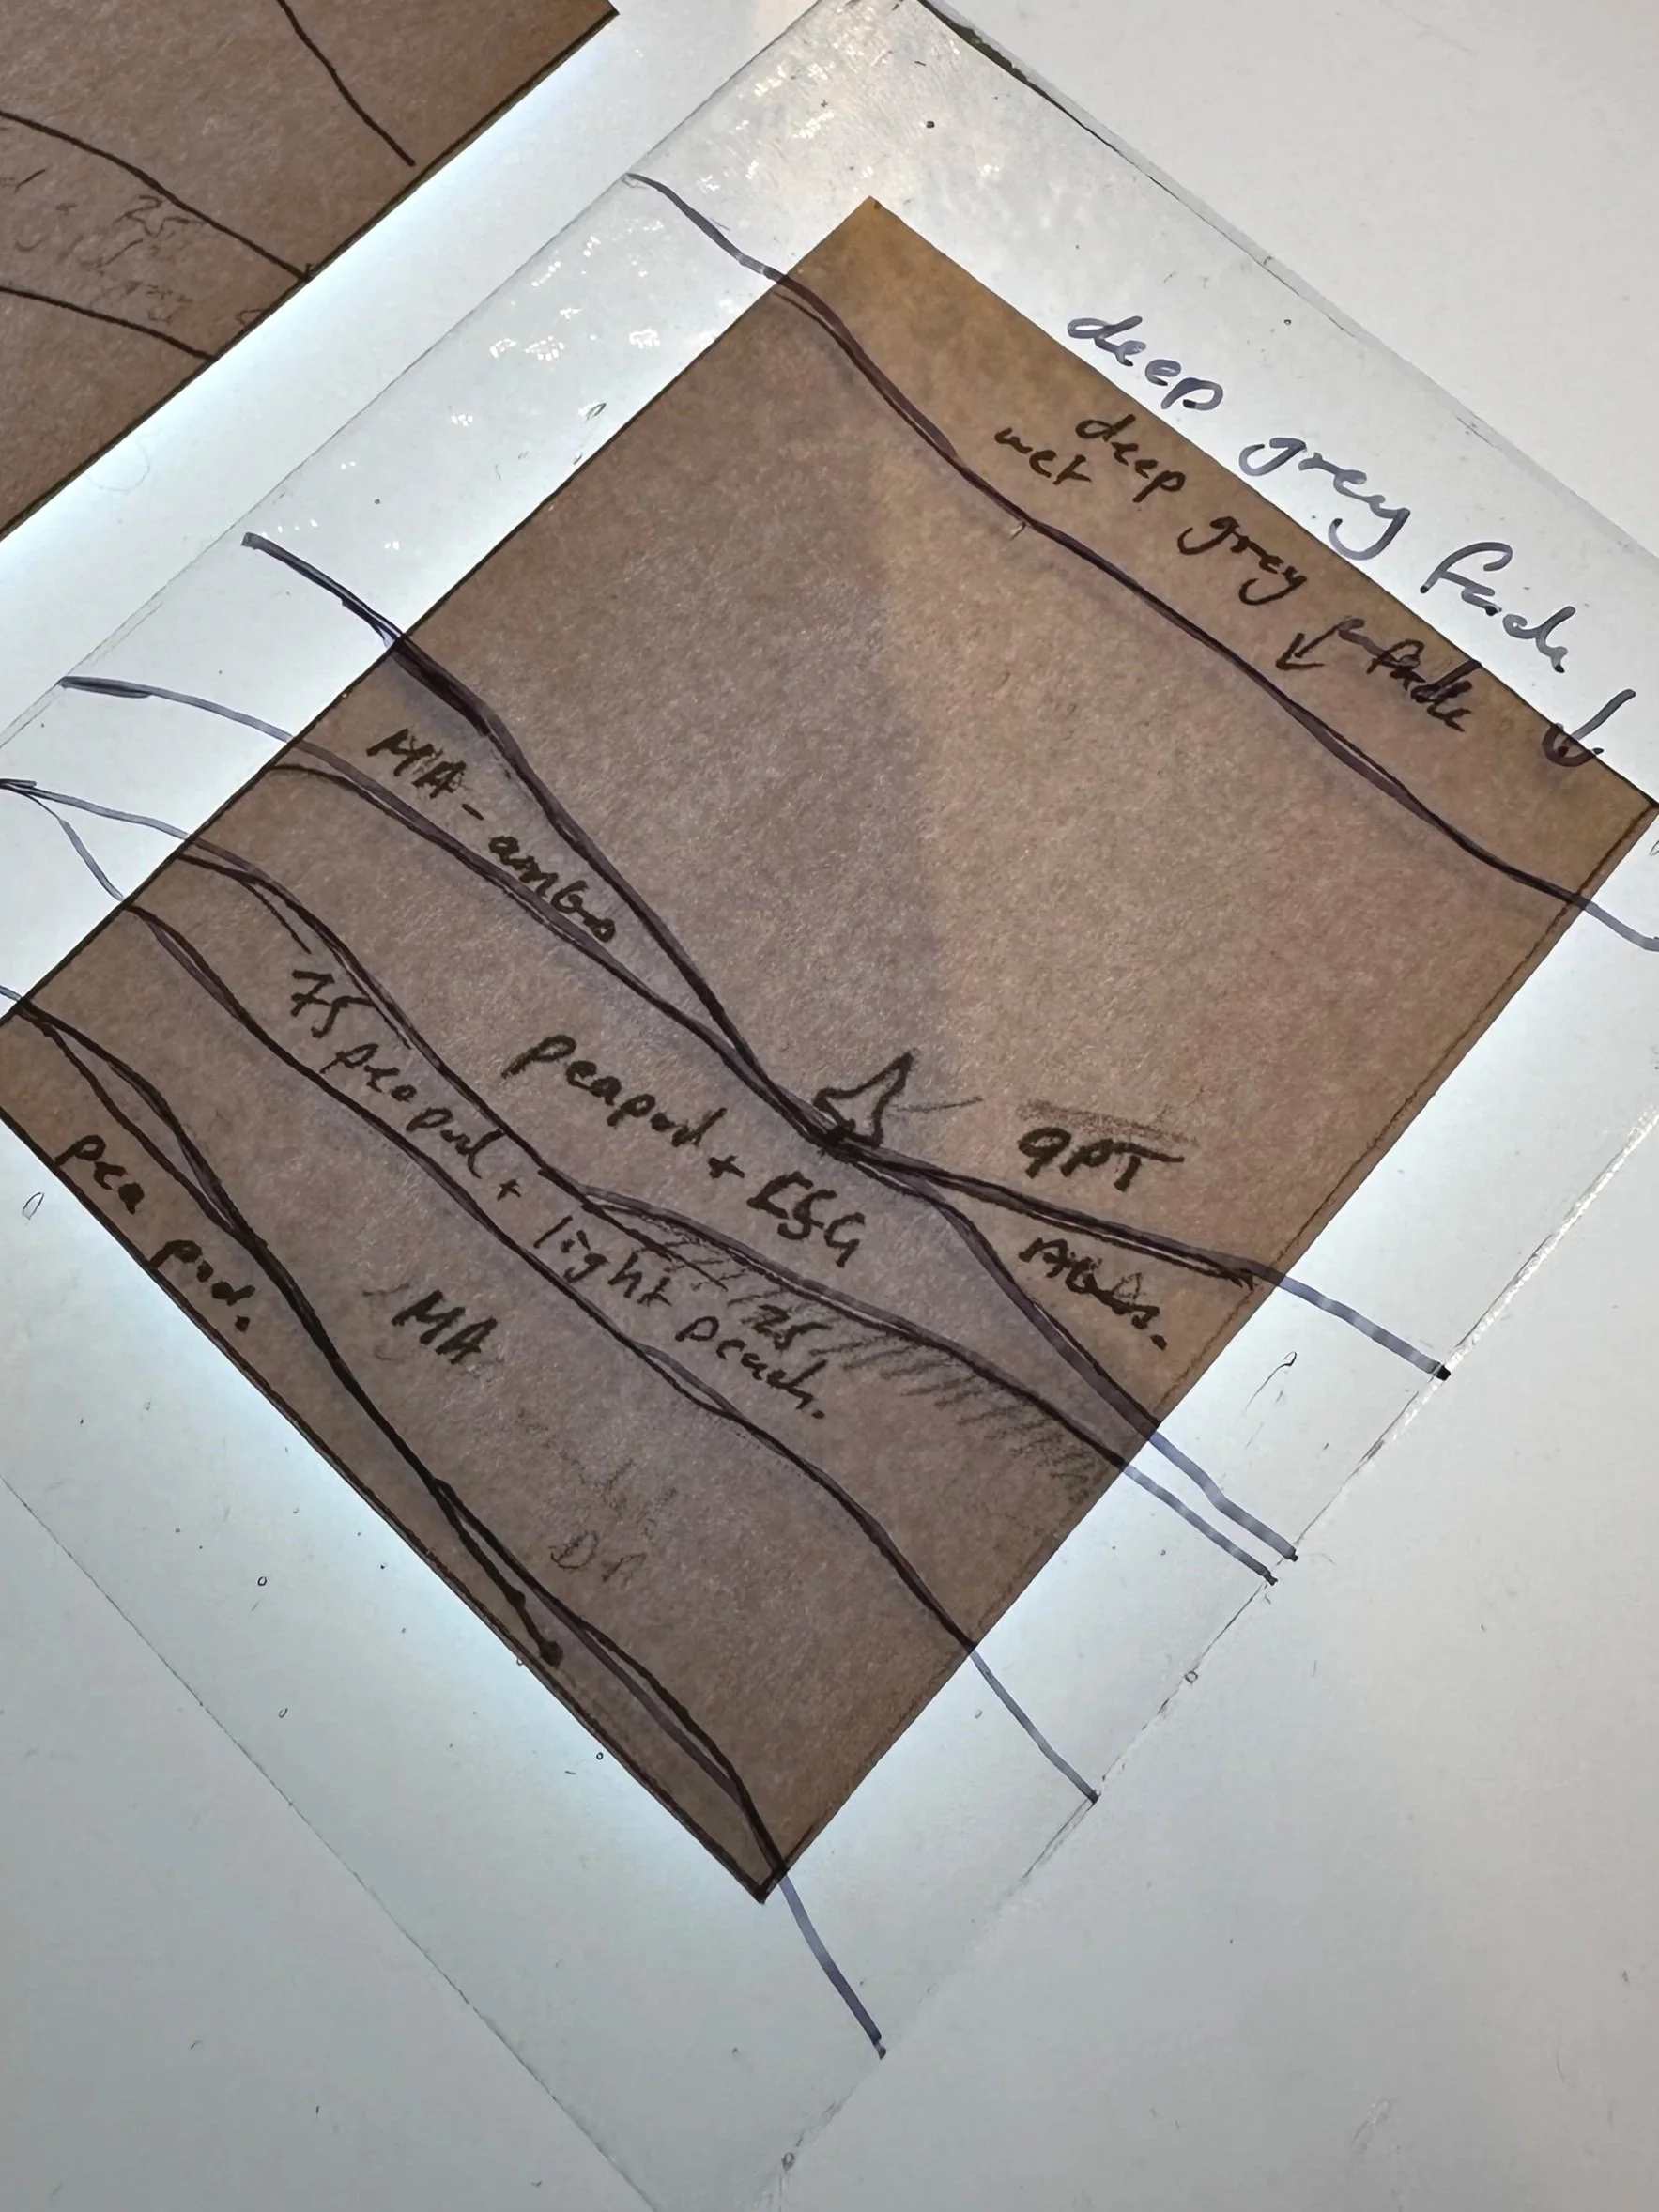
In the kiln, I use weights to compress the glass so it refines down to around 4–5 mm thick, which means the piece spreads considerably. Fused glass naturally seeks to settle at around 6 mm thick when fired to full-fuse temperature. That’s why artists use dams or, in my case, weights to control spread and compression. Once the piece is fired, I return with a viewfinder (the original size of the cut glass) to mark up before heading to the tile saw. However, my initial design had almost disappeared off the page — the sunset looked beautiful, but most of it was outside the viewfinder area! I knew the layers would spread, but I wasn’t sure which ones were doing the most shifting.
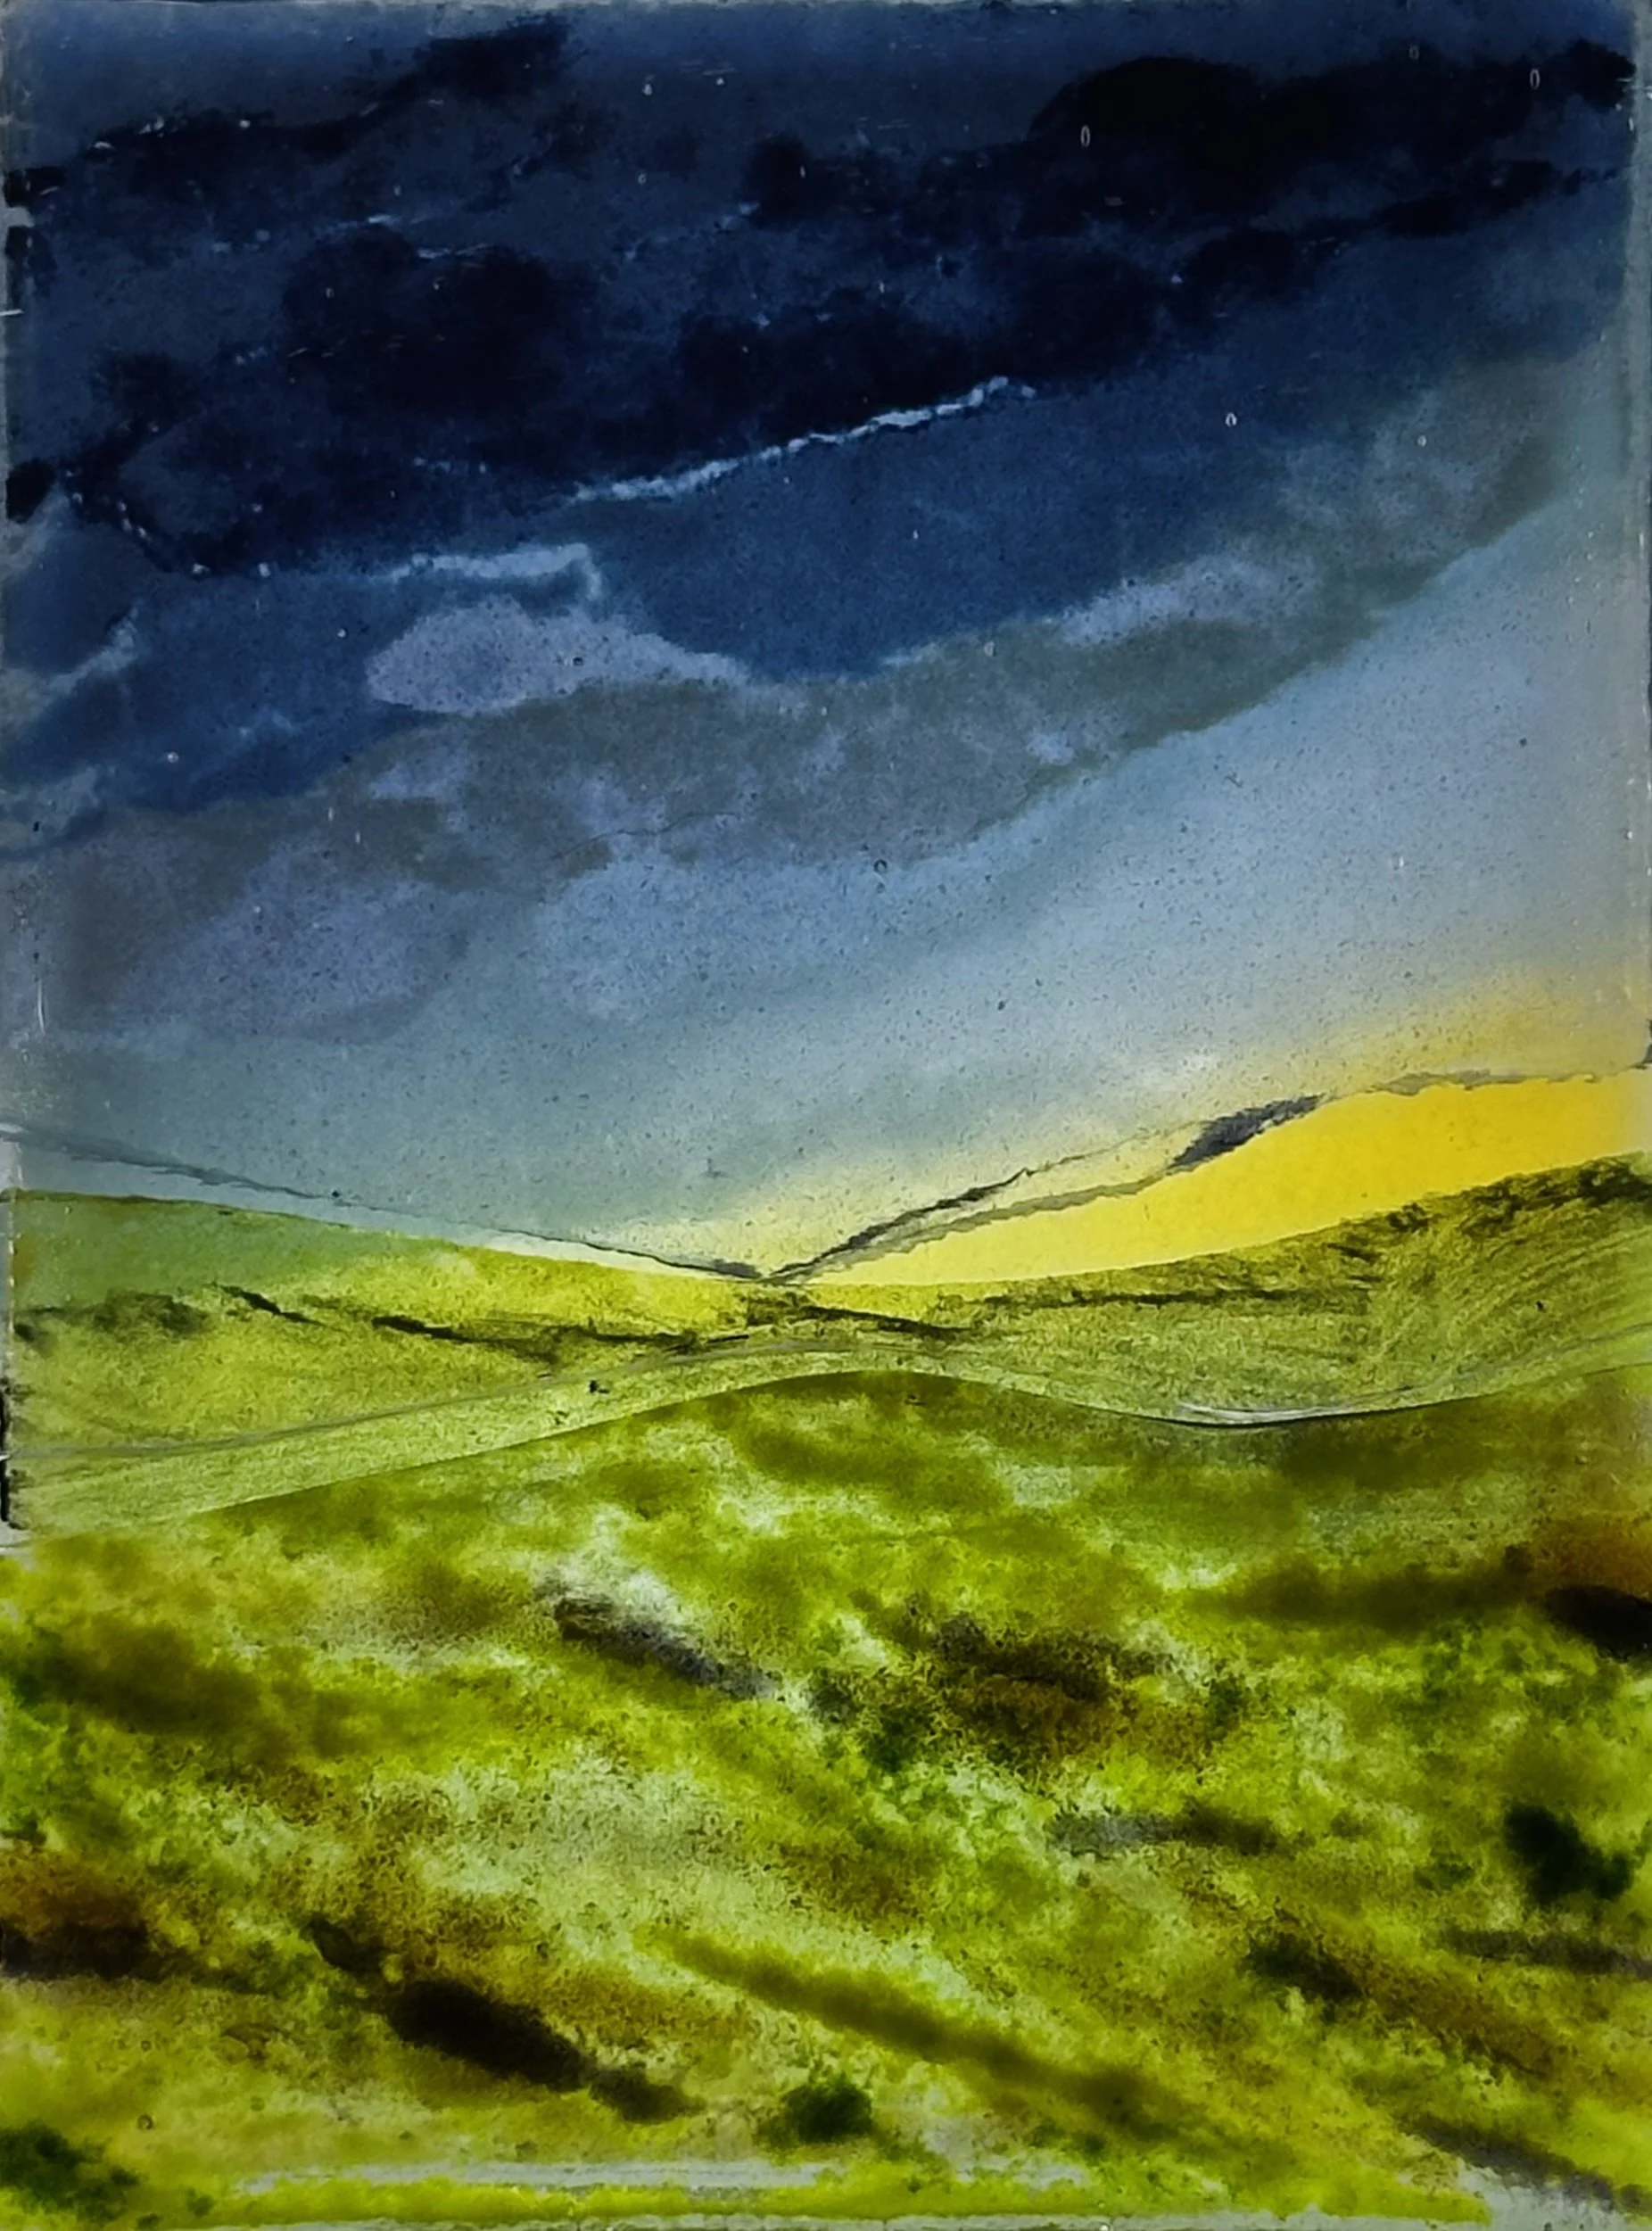

1. Stacked glass on the light box – ready to fuse. 2. Compressed in the kiln – before firing begins. 3. Fused landscape – the finished piece after firing. 4. Using the original viewfinder template – where has all that dark sky disappeared?
Testing the Theory
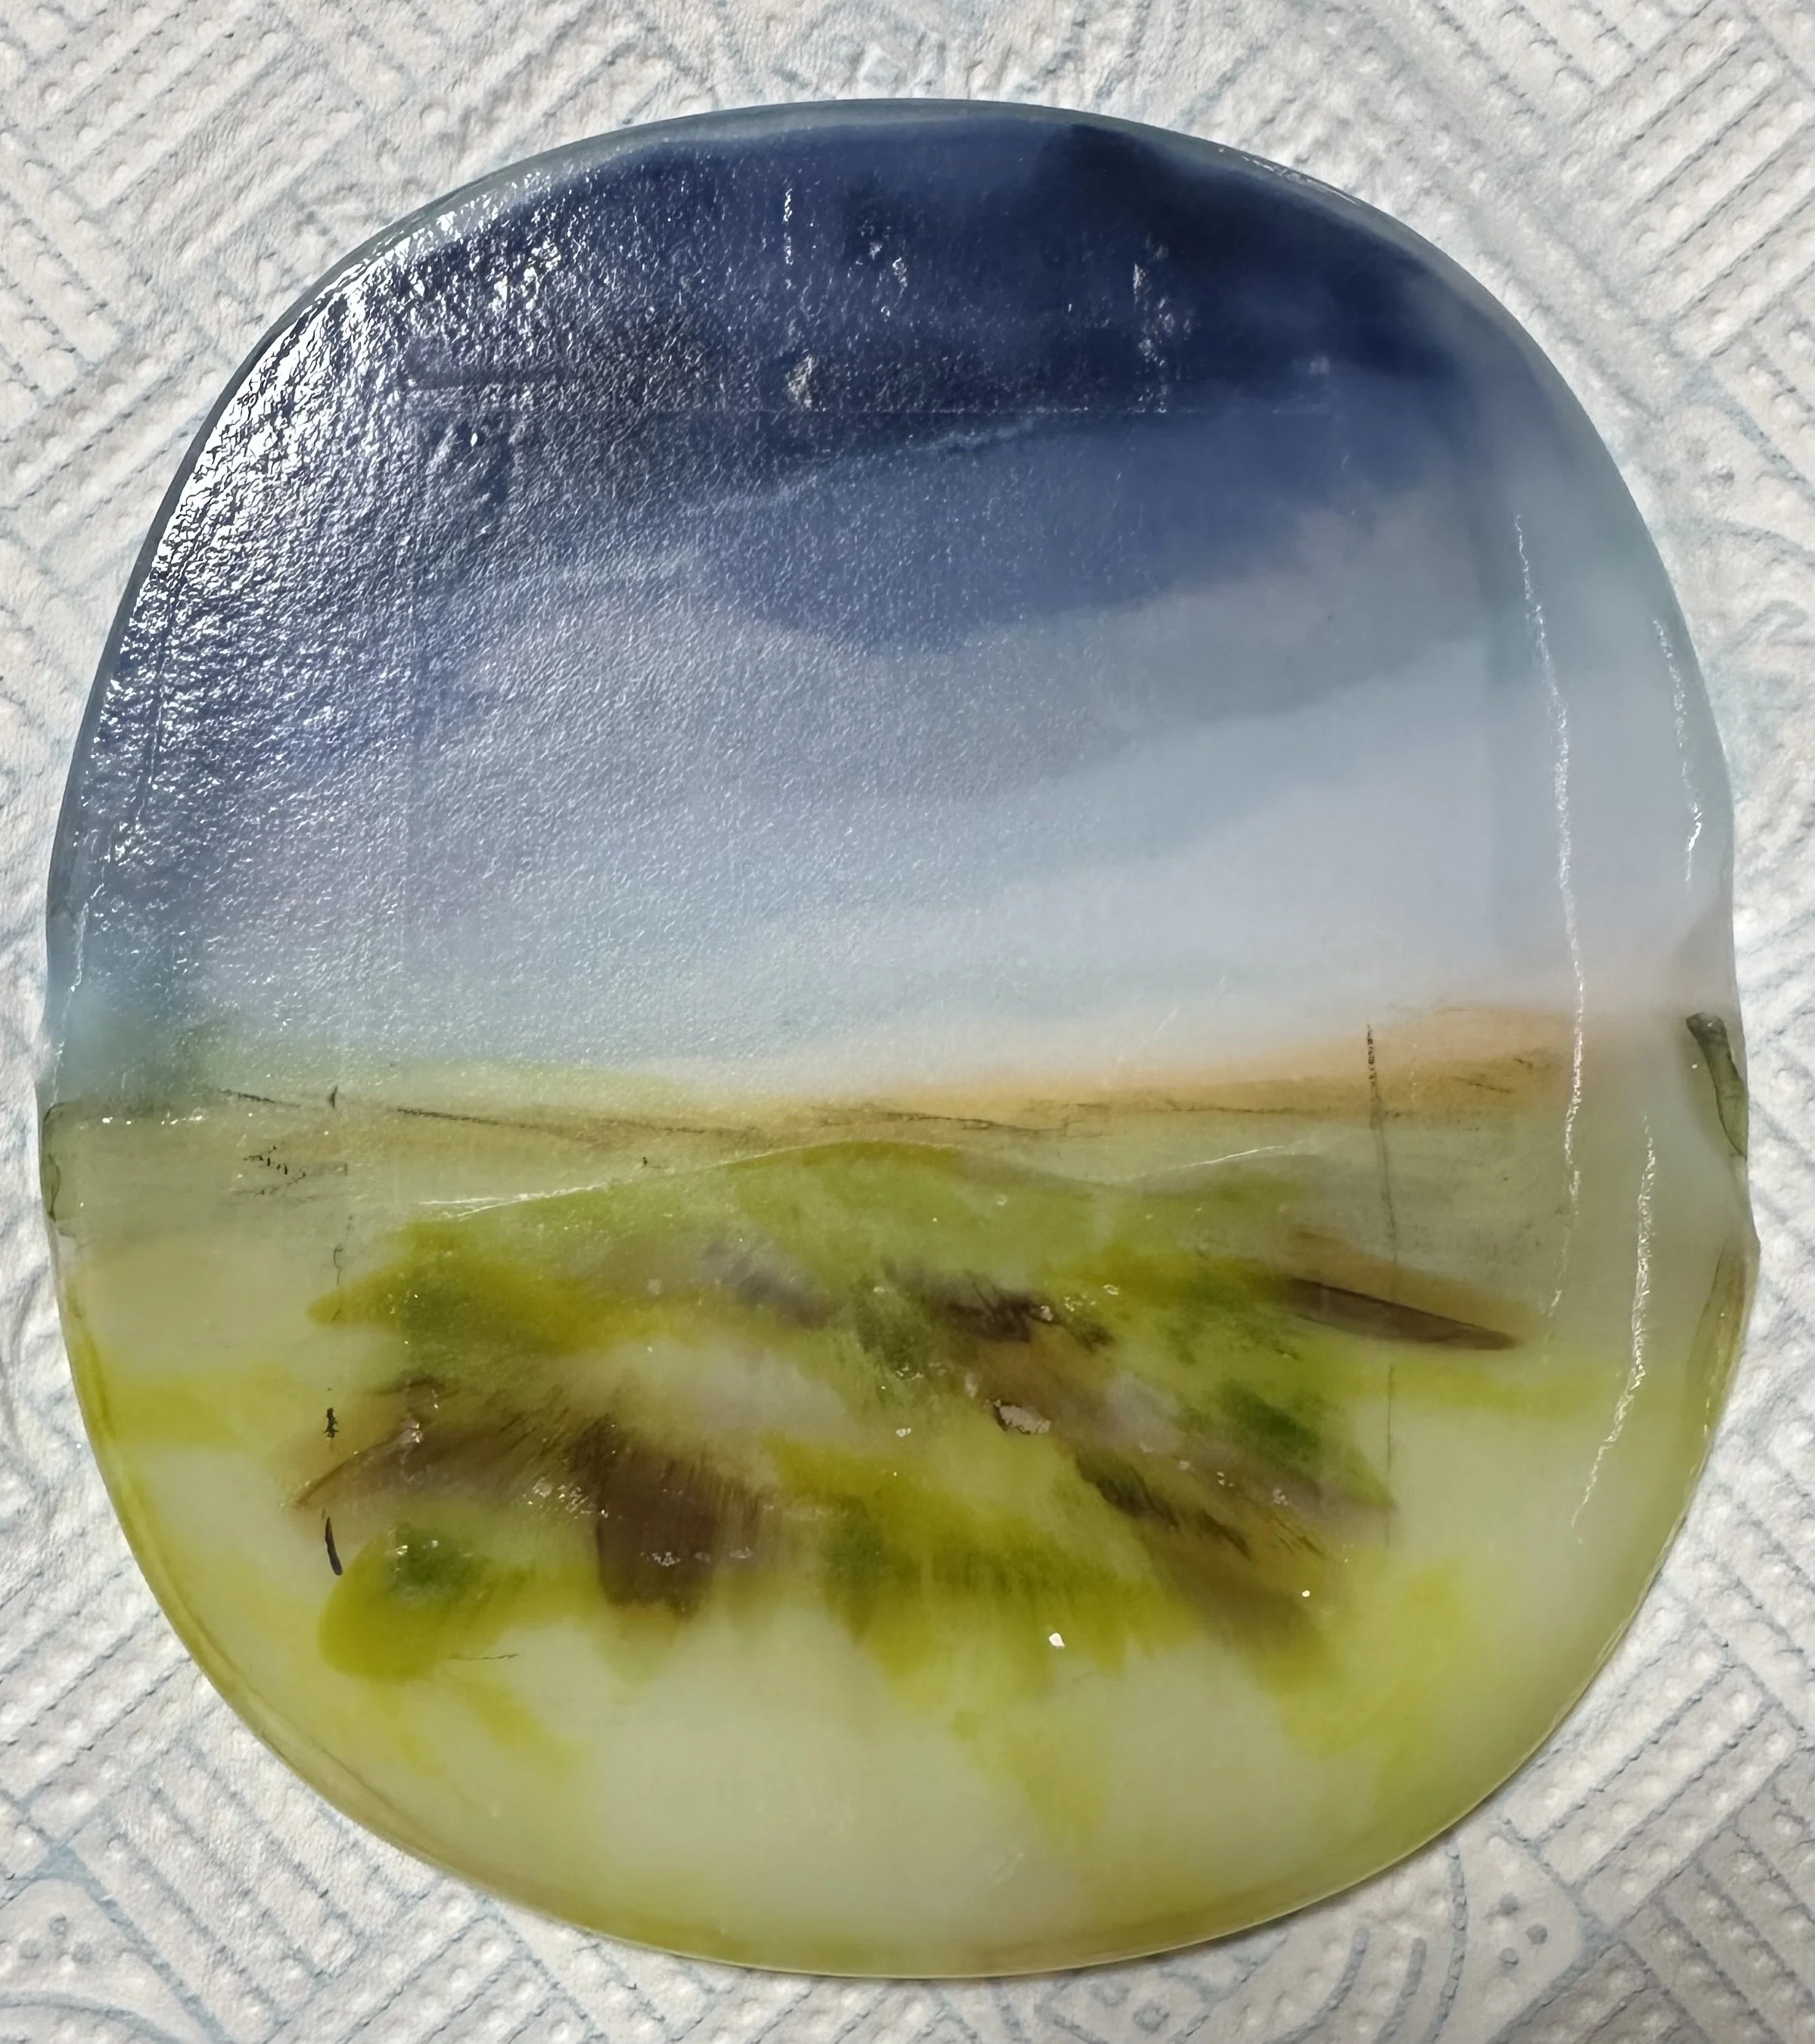
My glass mentor believed the bottom layer would stretch the most and the top layer the least — which made sense. To test it, I created a screen-printed grid at 1 cm intervals on each layer and fired them together with a similar-sized landscape piece.
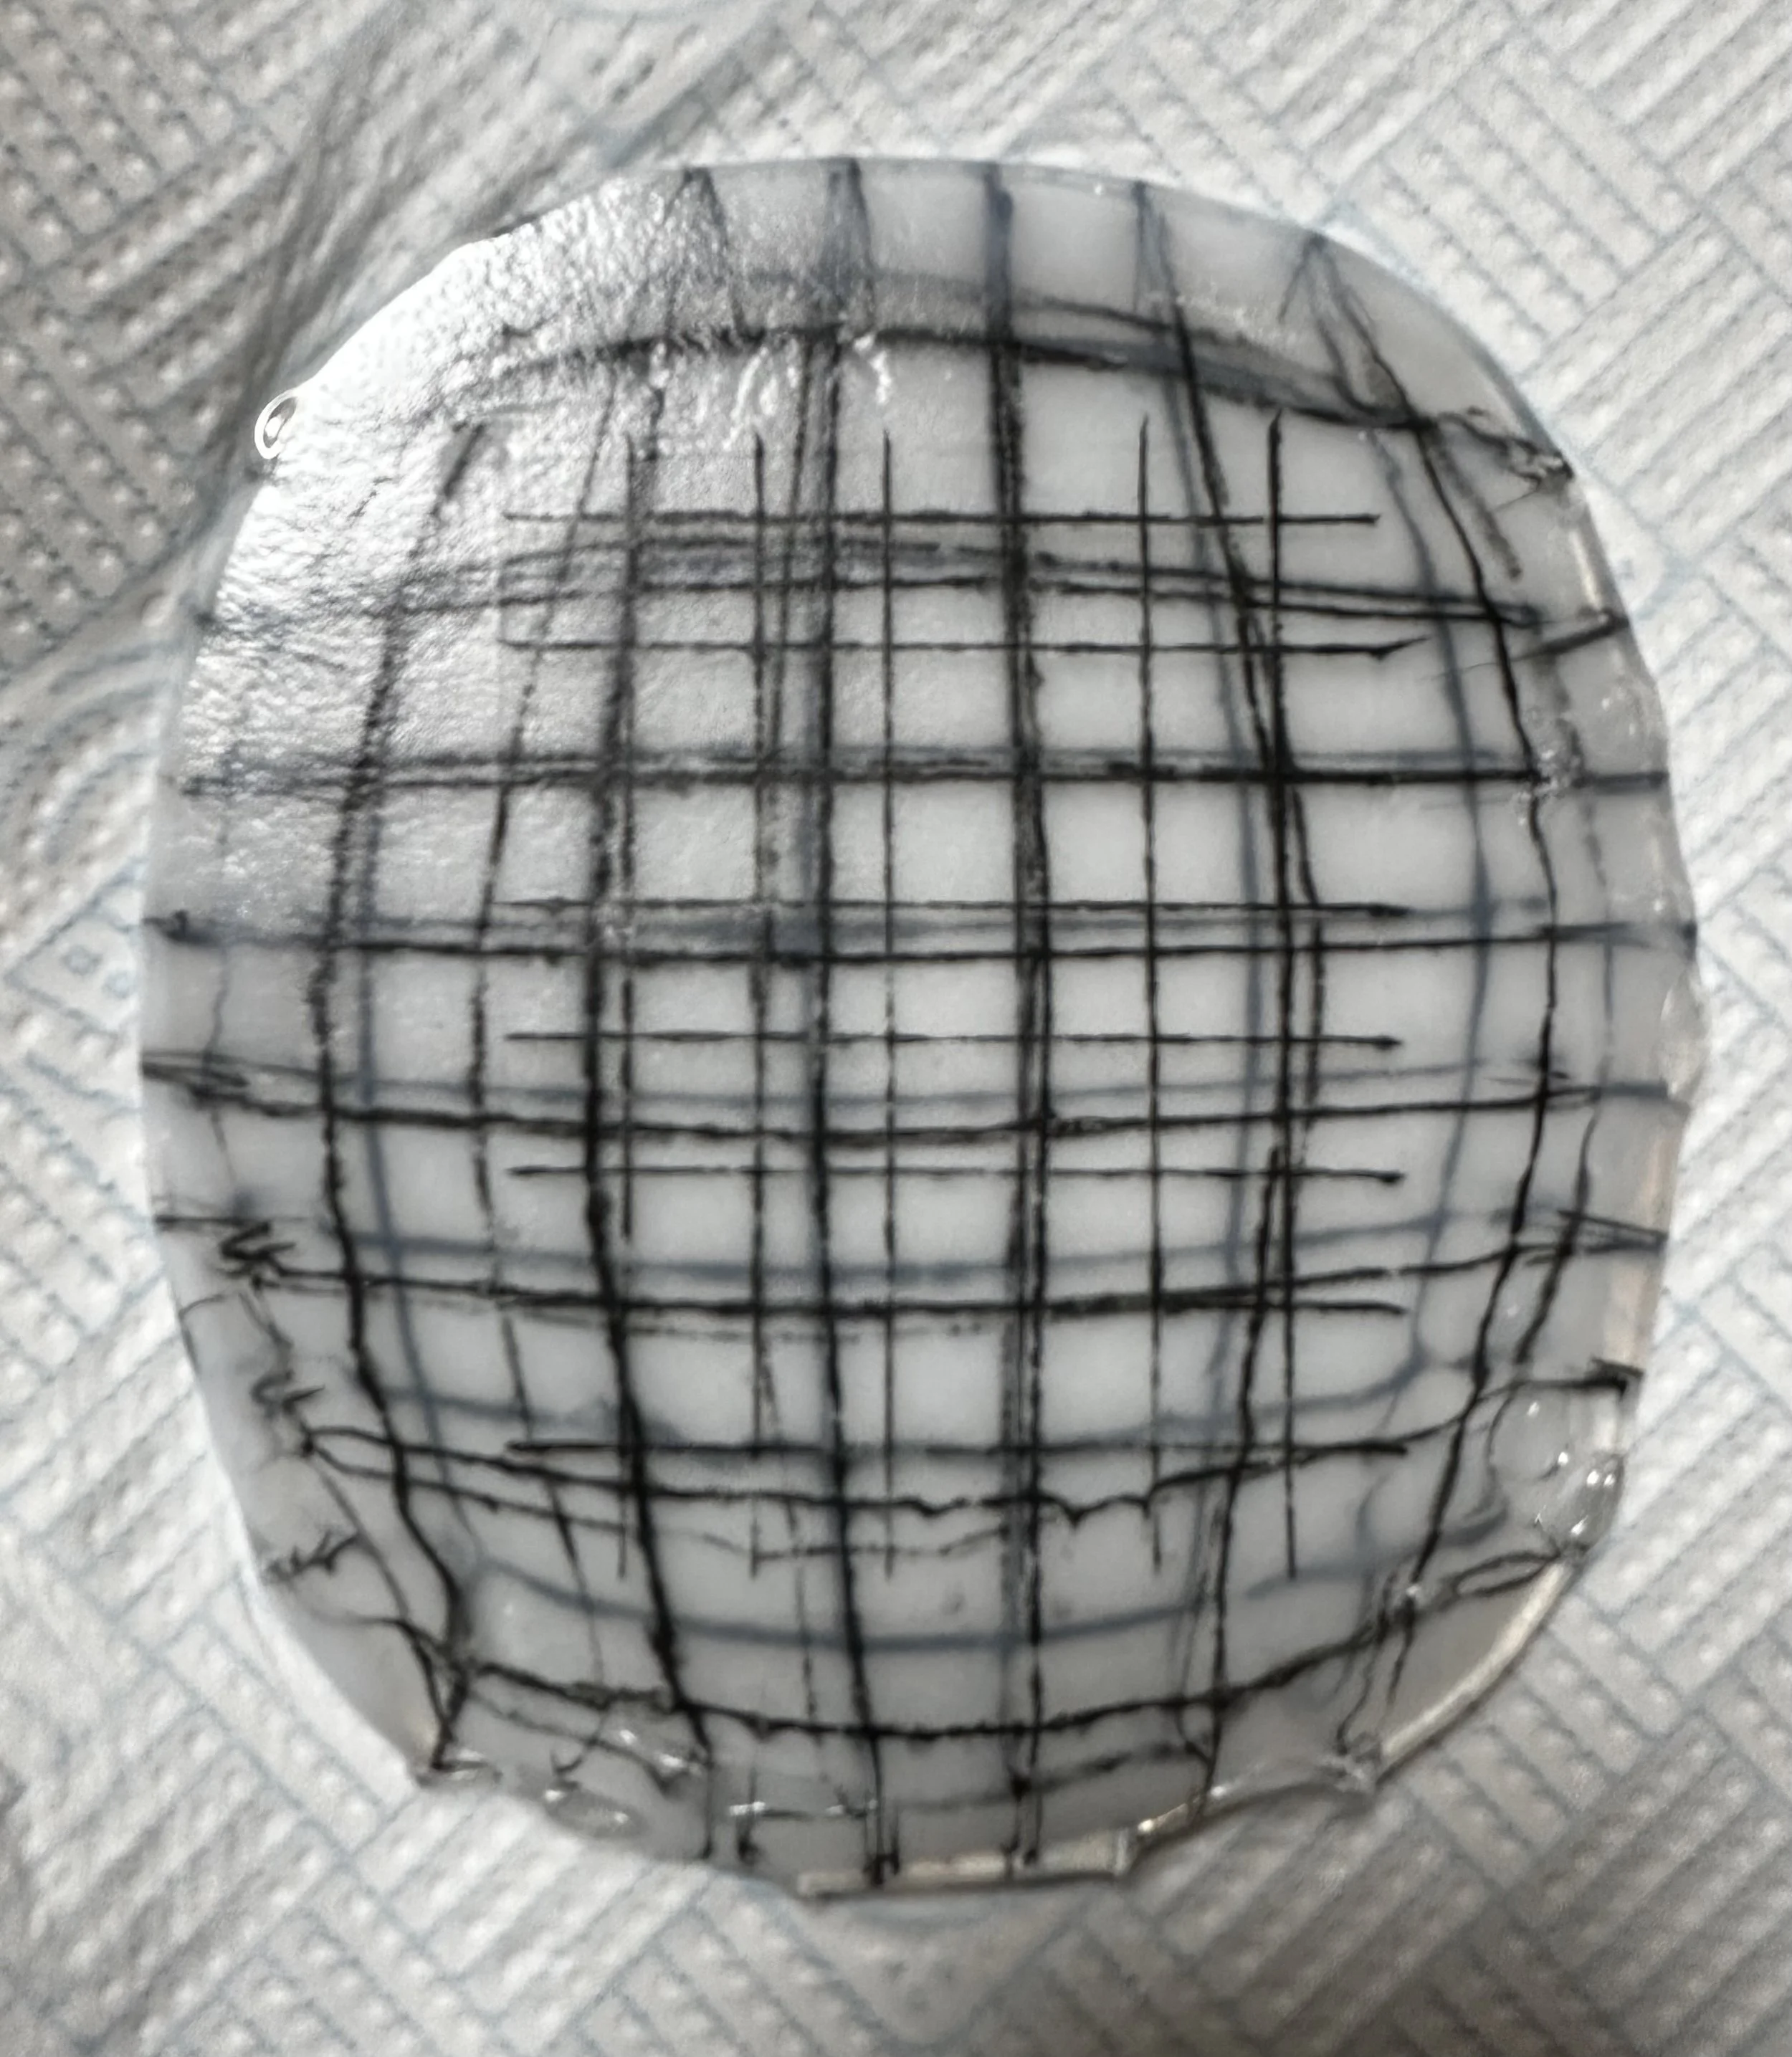
The results were… enlightening! The bottom layer spread significantly, but not as much as the two middle layers — and, surprisingly, the top layer actually shrunk slightly from its original size. Glass really is where art meets science — and the physics is well beyond my GCSE single science!
So, I’ve let the designer-engineer part of my brain take over. I’ve worked out that the bottom layer design needs to be about 75% of the original size, and layers two and three around 65%. However, the glass itself still needs to remain full size for even compression, so I’ll be reducing the design, not the glass. To simplify, I’m starting with both the bottom and middle layers reduced to 75% — and we’ll see how that fires.
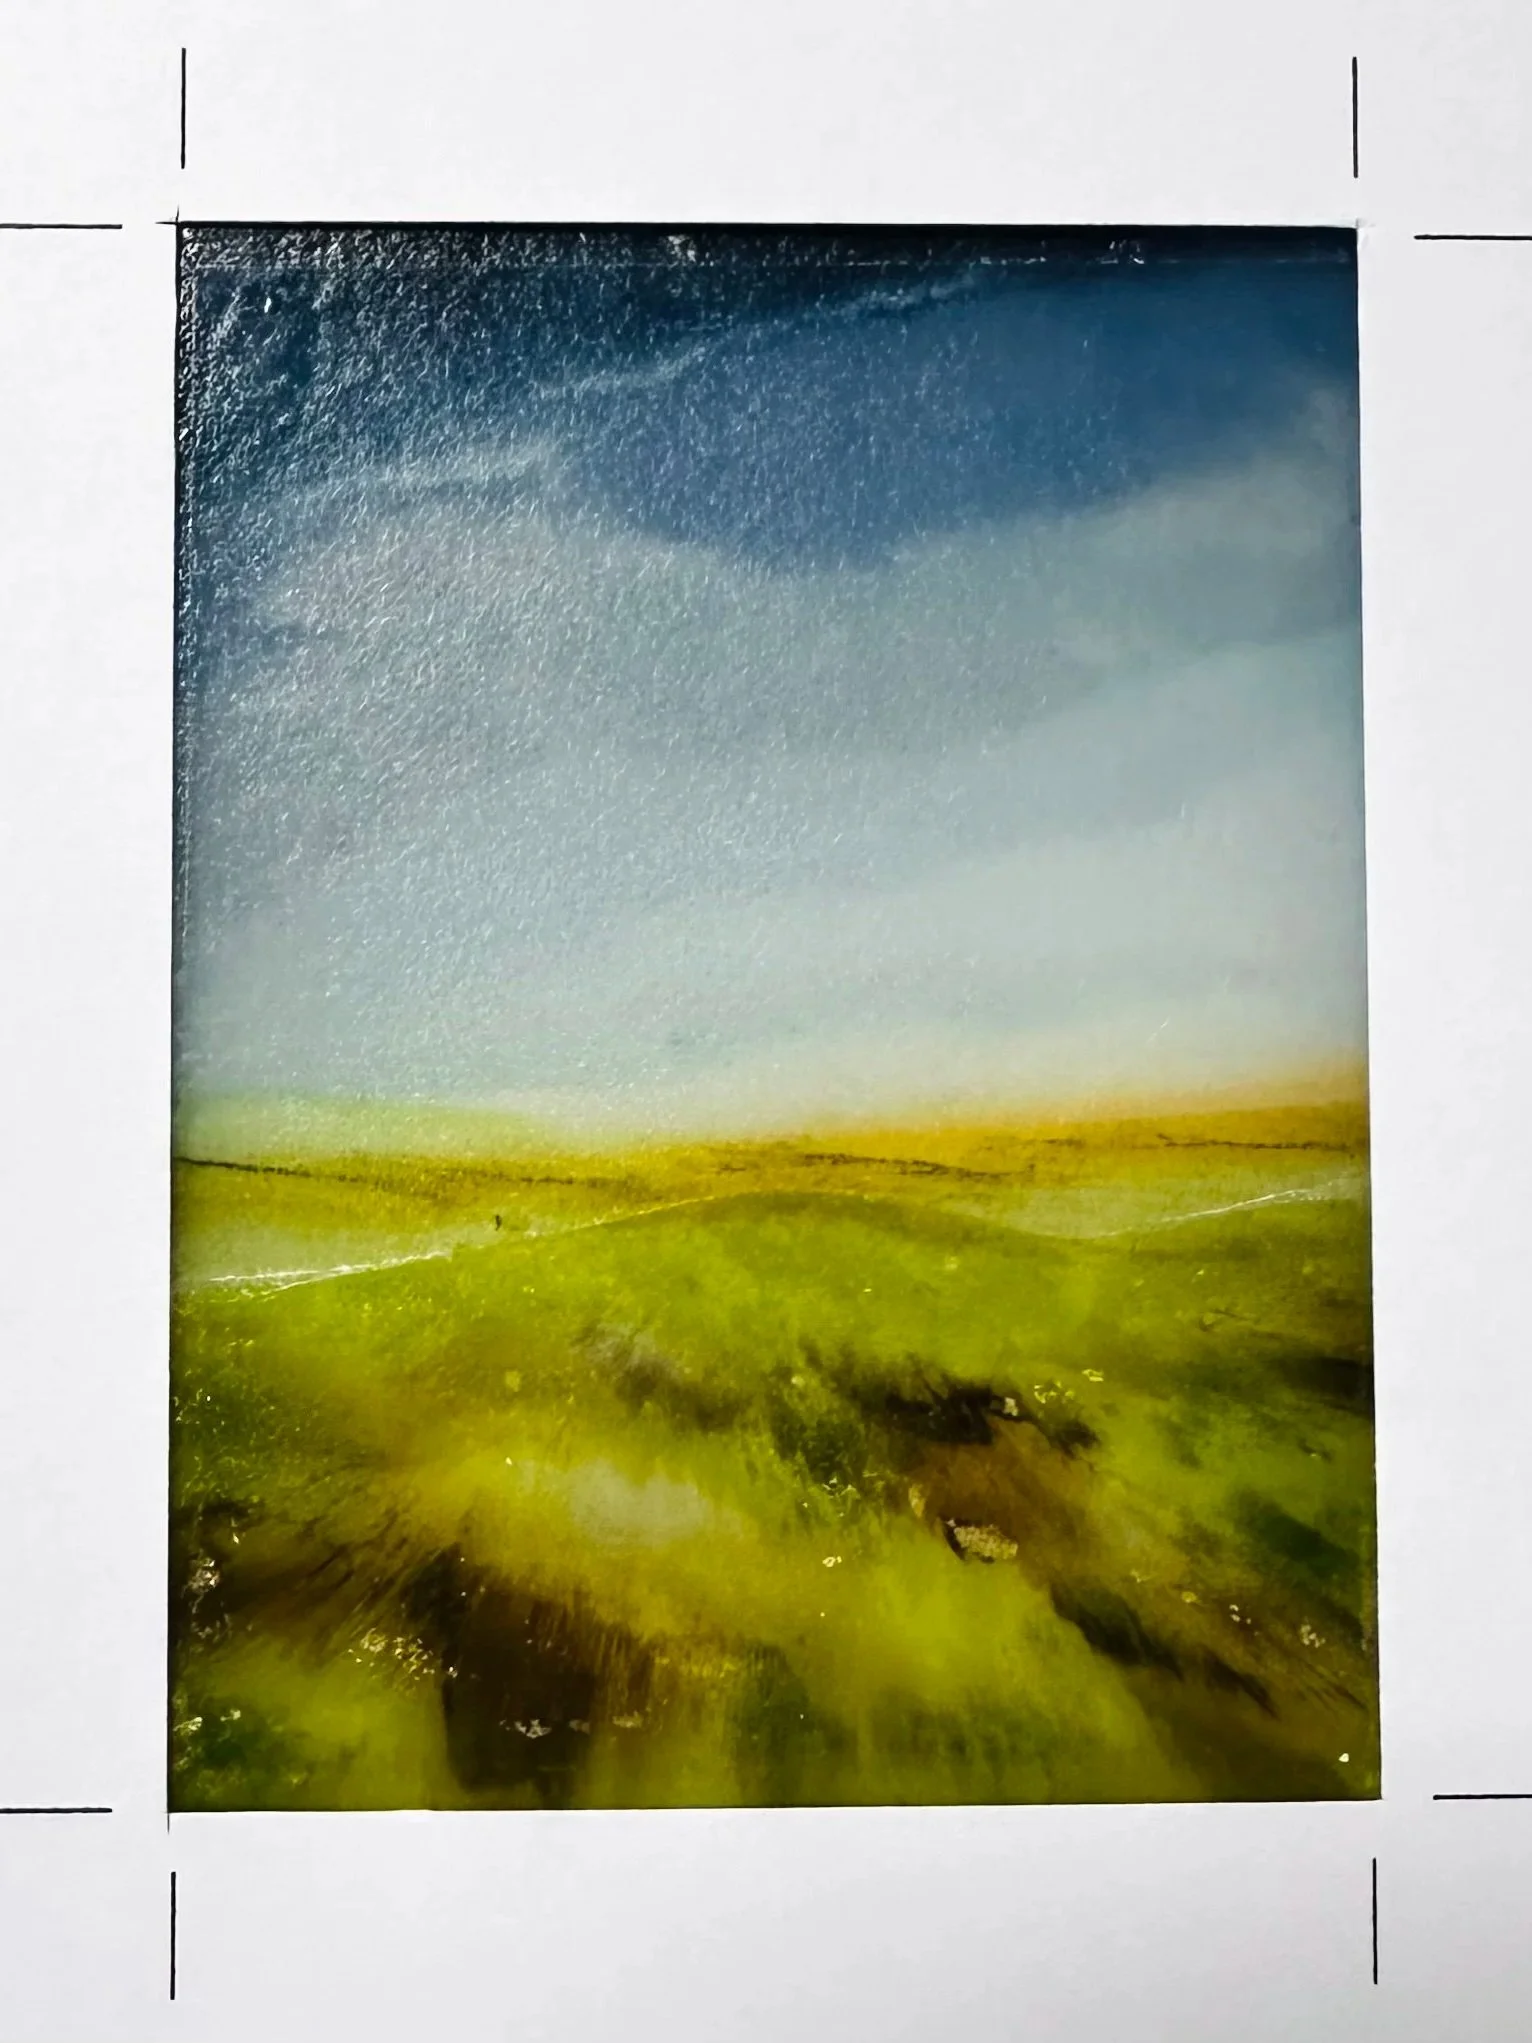
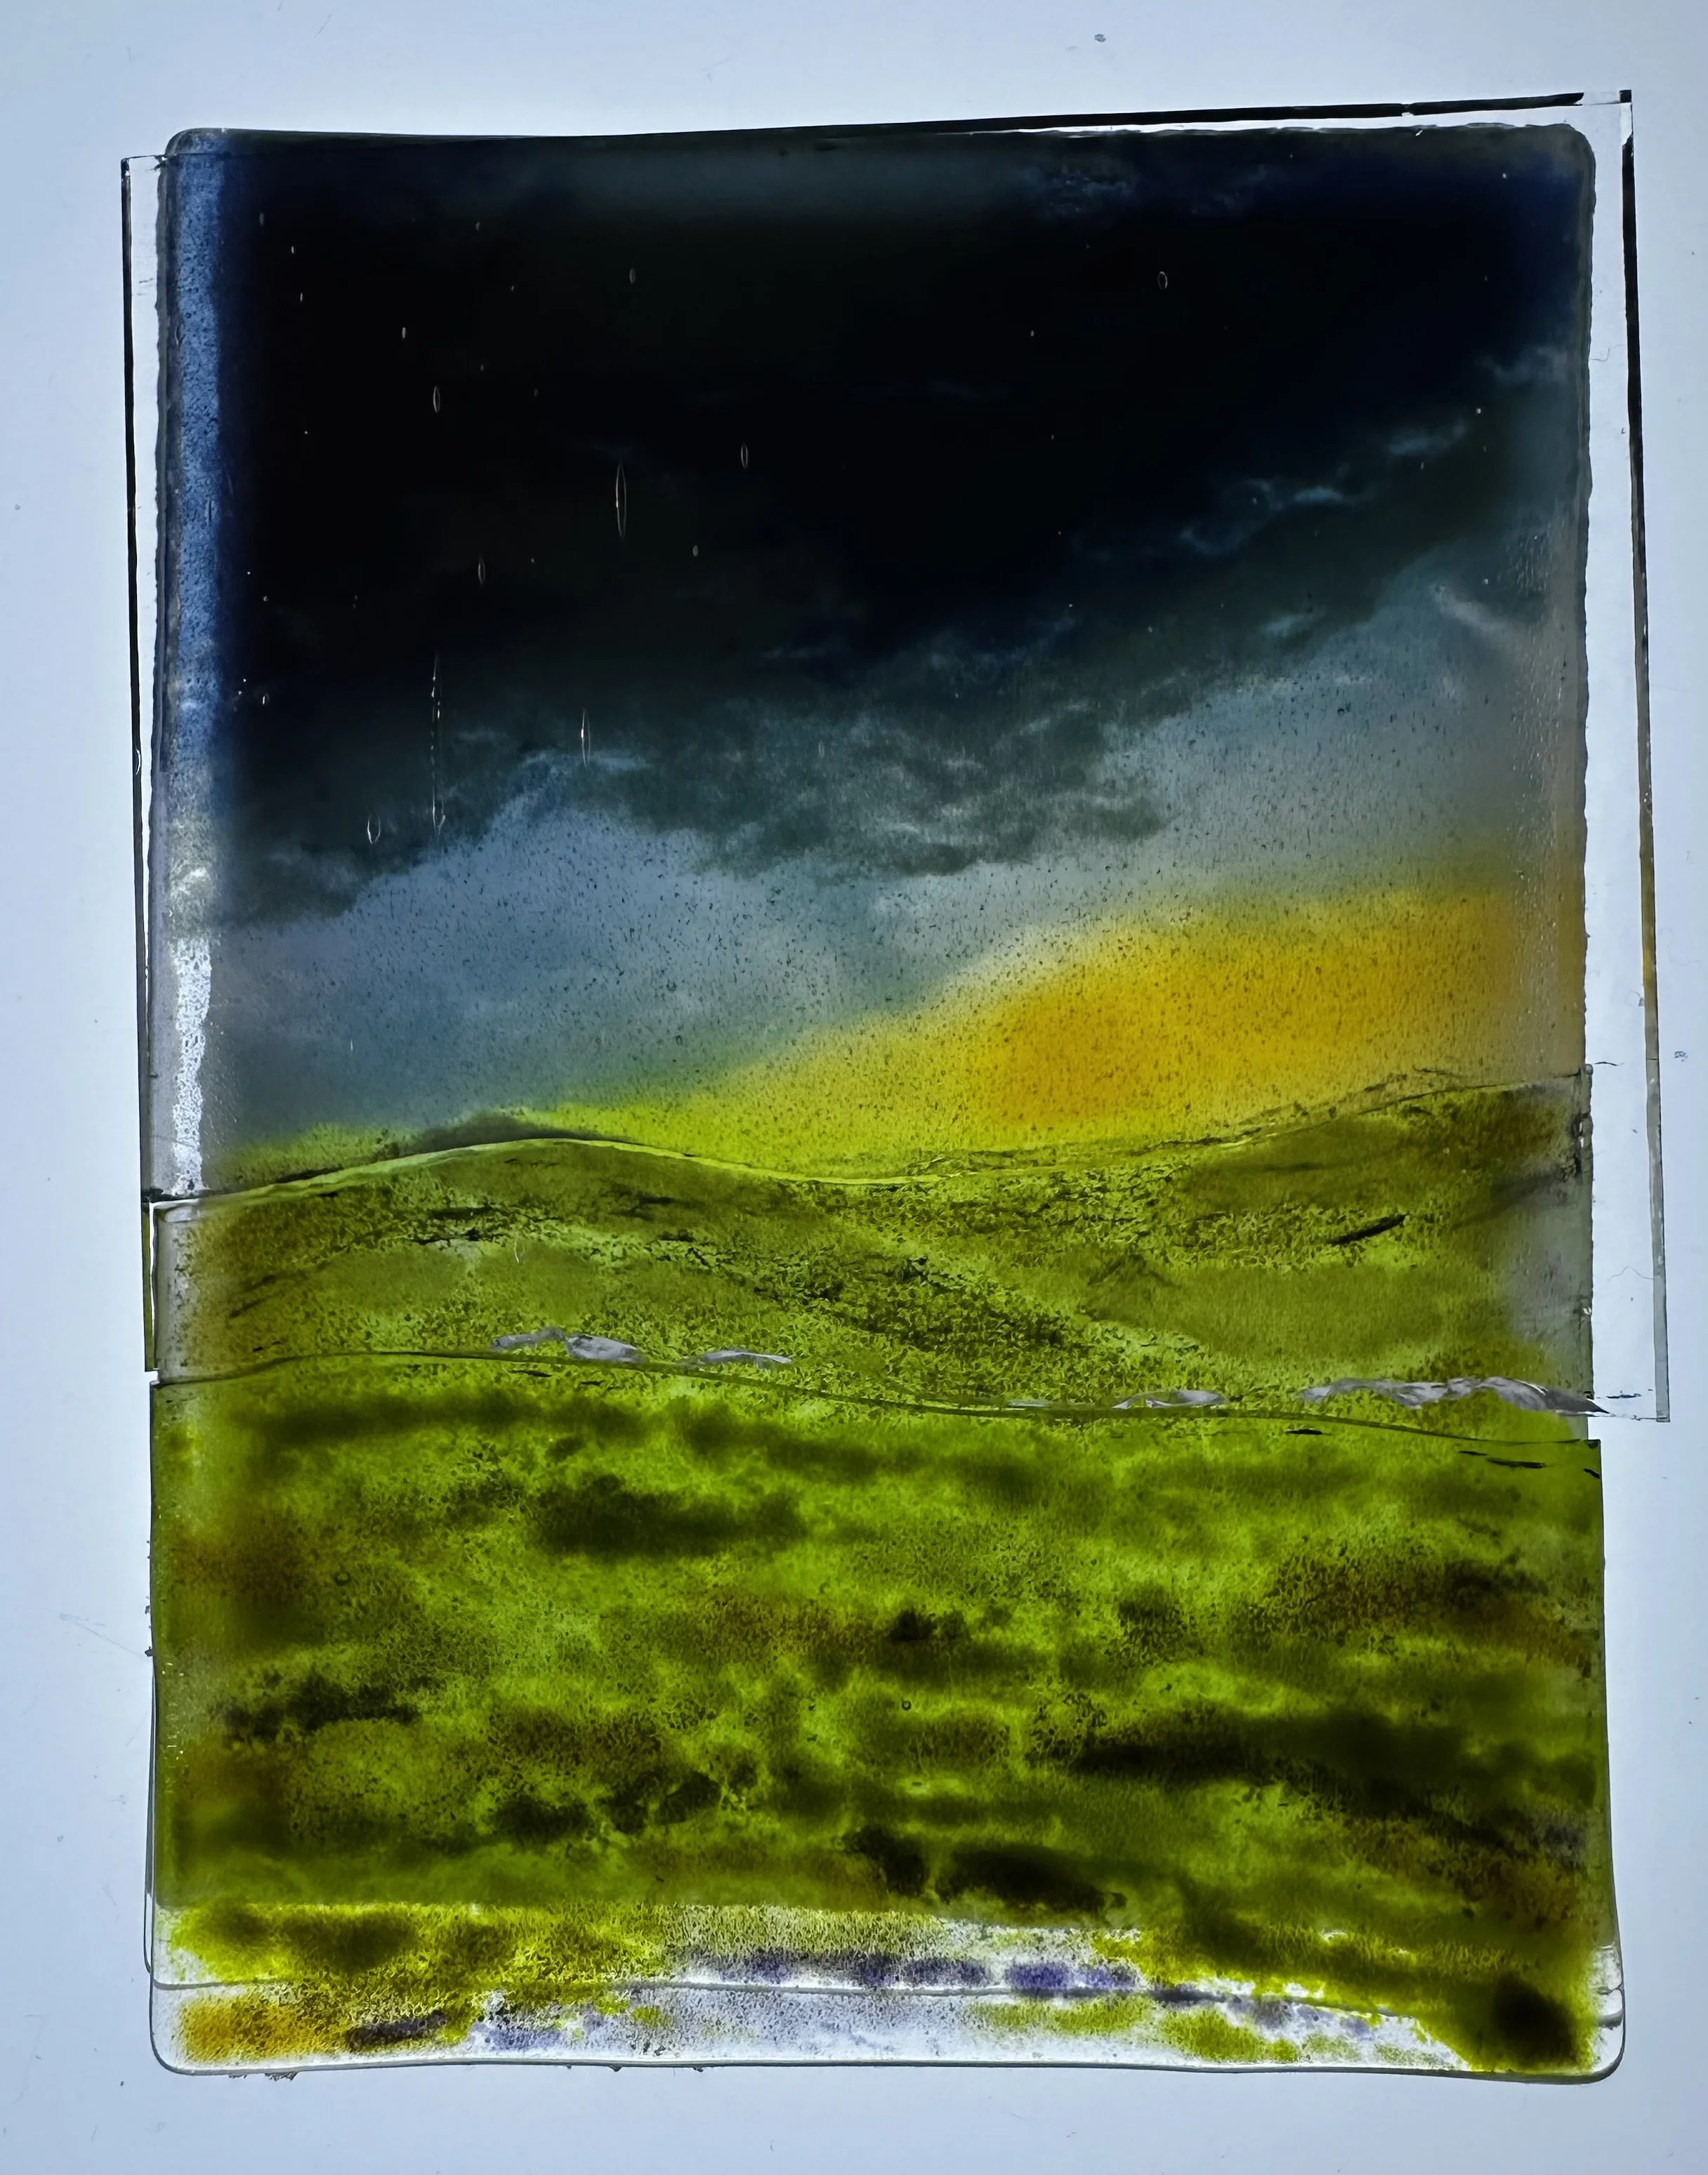
Second Attempt: Almost There
And here’s my second attempt — I’d say it’s about 90% successful. During the grid experiment, I noticed that the top layer had shrunk slightly, which means I’ll need to compensate for that. Since I’m aiming to standardise my landscape sizes, I realised that when I start with the original glass dimensions and use the viewfinder to mark them up, the finished piece ends up slightly smaller. To correct this, I’m going to increase my top layer design by about 5 mm. Hopefully, that adjustment will do the trick.
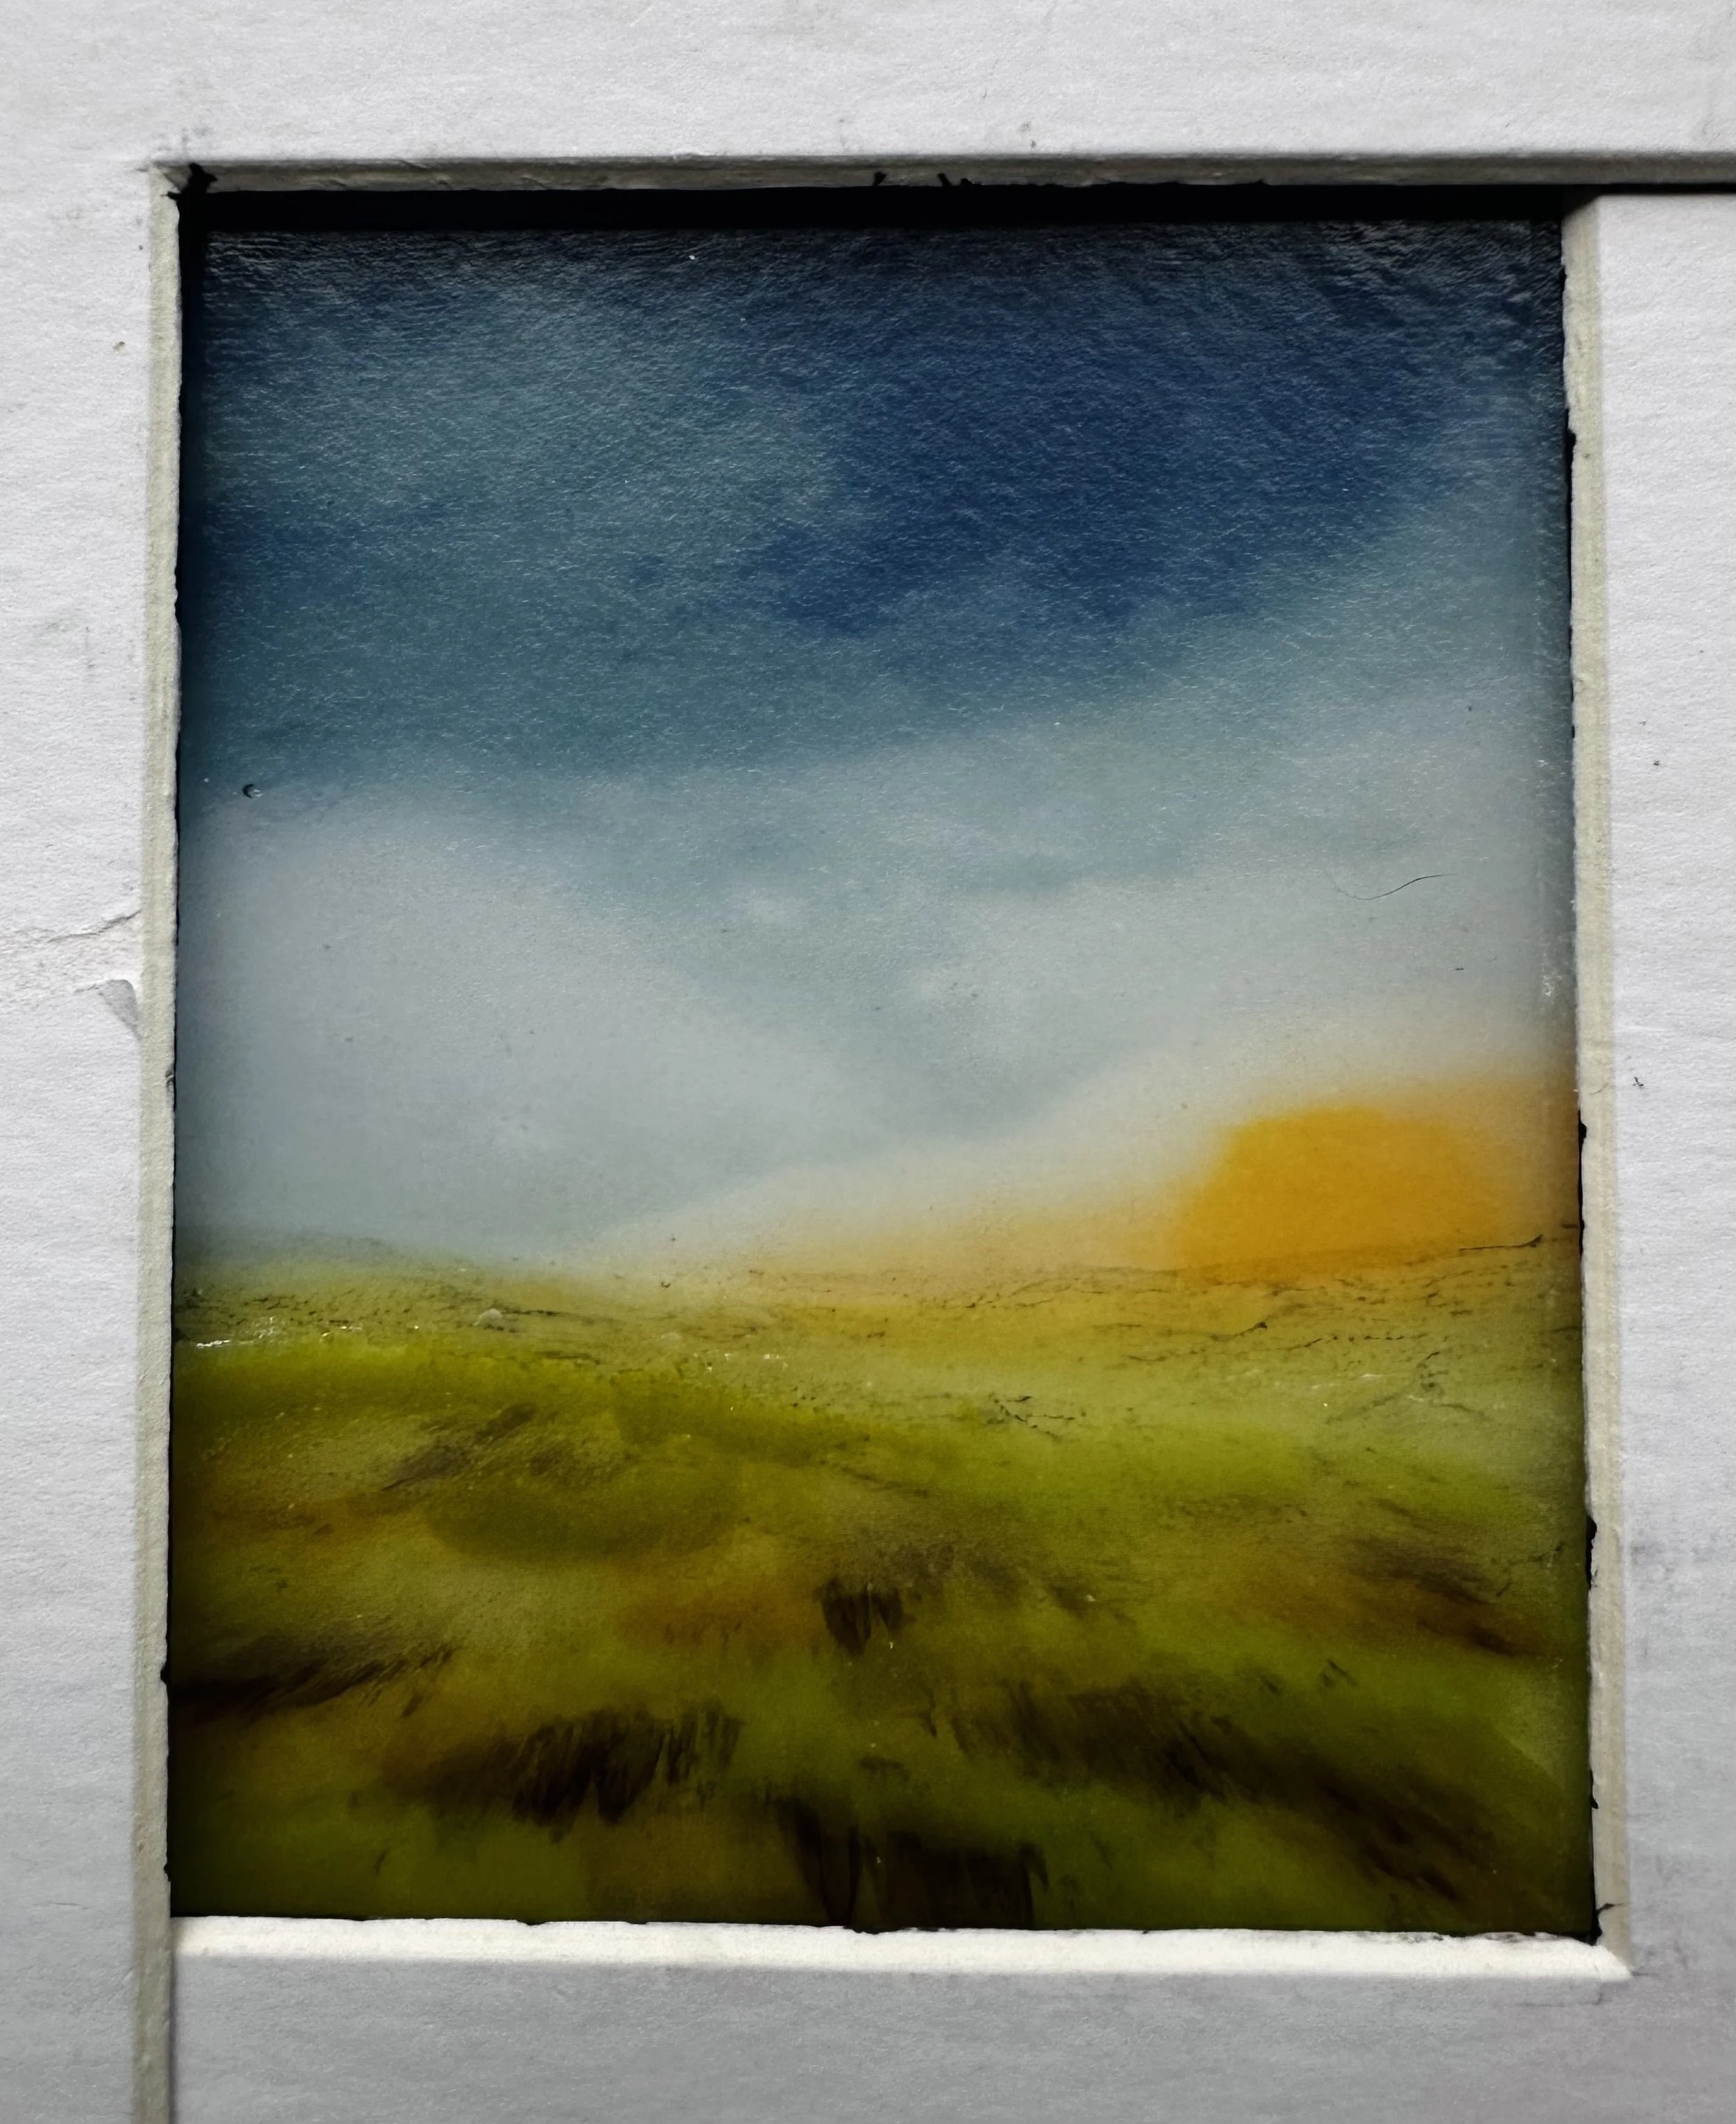
1. Stacked glass on the light box – ready to fuse. 2. Using the original size viewfinder – most of the sunset has survived the process, but look at the sun! (Yes, that was a new addition from the original.) It started out no bigger than a hole punch, and now look at the size difference the stretch has created!
Every test brings me a little closer to understanding the balance between control and chance — and that, I think, is what keeps me hooked.
I’m sure there’s still plenty more learning ahead, but taking the time to stop and experiment now will hopefully pay dividends later.